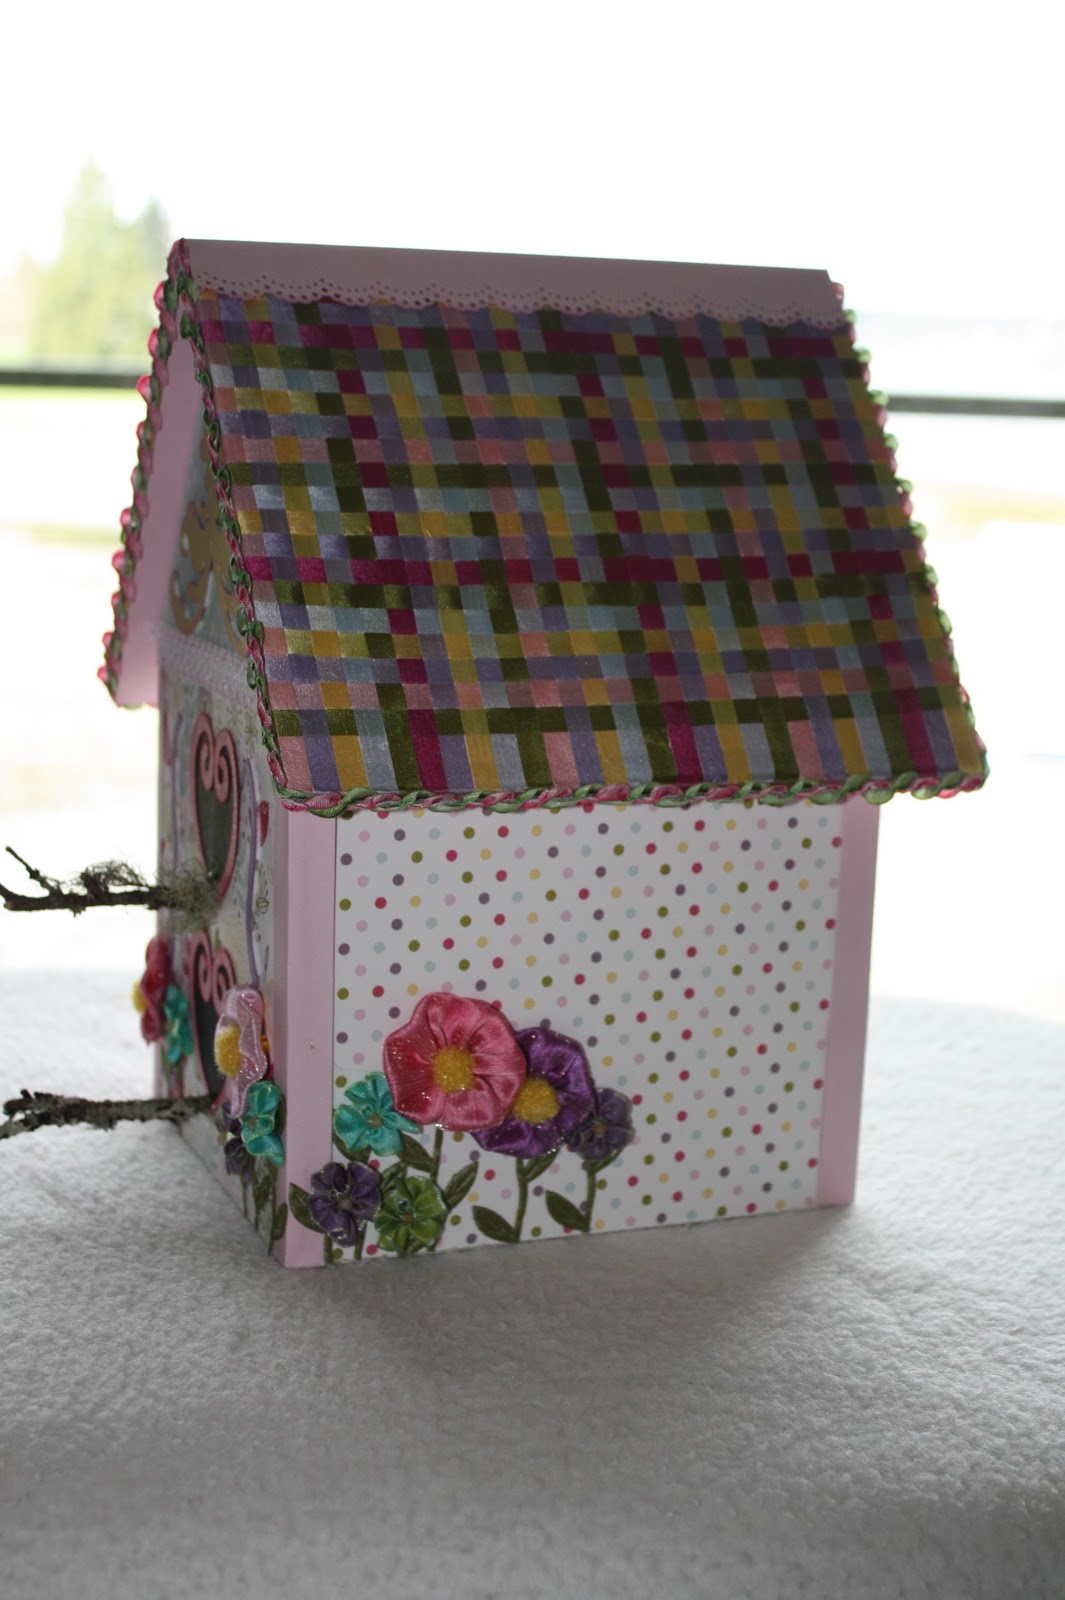
Spring Bird House
Featuring May Arts Ribbon
Paper by Echo Park
Designed by Monica Brickman
Supplies needed:
May Arts Ribbon Zip Dry Paper Glue
Echo Park paper Tombow Dotto Adhesive
Bazzil cardstock Super Tape
Zots dot adhesive Foam Tape
Assorted colors Color Box Chalk Foam Core Board
X-acto Knife Ruler and Pencil
Needle and Thread
House dimensions :
Front and back wall 6 1/4" x 10 1/2" - gable front 4 3/4" on each edge from 6" measurement to the top point. (See photo)
Side walls 7" x 6"
Roof 16" x 7" overall size each side should measure 8" x 7"
House bottom 6 1/4" x 6 3/4"
Begin by cutting your foam core board to the above dimensions using an x-acto knife. Make sure to use a cutting mat under your knife! When you are ready to cut out the roof portion, only cut partially through the foam core. This will form a hinge and allow the foam core to fold in the middle. The roof will still be one piece 16" x 7". Each side or half of the roof should measure 8" x 7". When folded, the cut edge of the roof should be on the outside of the house.
Cut your paper to the following dimensions;
Lower front and back (2) 6" x 6"
Gable top front and back (2) 6" wide, angles 4 3/4" long the roof should measure 4 1/2" in height. This triangle will cover the peak portion the roof (see photo)
Side Walls (2) 7" x 7"
Roof (4) 8" x 7" pink cardstock
Roof (2) 8" x 3" pink cardstock scored down the center at the 1 1/2" mark. Select one piece of cardstock and in addition to scoring down the center use a decorative punch to punch a scalloped edge on each 8" side. Lightly chalk the scalloped edges using pink pastel.
Side trim (4) 1" x 6" pink card stock-score down the center
House bottom 6 1/4" x 6 3/4" blue cardstock (do not attach this cardstock until the house has been assembled.)
Using Zip Dry paper glue,
Adhere the papers onto the fronts and sides of the foam core board.
Roof : Adhere (2) 8" x 7" pieces of pink cardstock onto the top of the roof. The top is the side of the roof that has a cut center line.
House construction:
Using super tape, tape along the three sides of the left and right side walls. Do not apply super tape to the bottom of the walls.
House Front:
Remove the super tape covering and fit the left side wall onto the front house wall. The wall should be placed against the front of the house, so the measurement of the house front does not change. Make sure the corners are smooth and straight. Next fit the right side wall in the same manner.
House Back:
Repeat the same steps as in house front.
House Bottom:
Fit the foam core board snugly into the bottom of the house. The foam core fits into the bottom to help the house remain rectangular. Next using Zip Dry adhere the blue cardstock onto the bottom of the house. The Zip Dry will hold the bottom of the house onto the sides. Once dry you may need to sand the cardstock around the edges to assure a smooth fit.
House Corners:
Adhere a 1" x 6" scored piece of pink cardstock onto each of the houses corners. This will cover the raw or unfinished edges where the house is joined together.
You should now have a complete roofless house.
Weave the roof:
I used May Arts 1/4" silk ribbon in the following colors, SK27 yellow, SK05 lavender, SK22 magenta, SK16 mossy green, SK34 light blue and SK17 light pink.
Step 1:
Weave each half of the roof separately. Using Tombow diamond dot adhesive run a 1/4" adhesive line along the top and bottom (8") of one side of the roof. (Make sure this is the roof side with the cut center edge showing) No not apply adhesive to the roofs center.
Onto this adhesive attach 8" pieces of ribbon in the color order described above. I alternated the magenta and light pink ribbon every 5 rows. It should use 28 pieces of ribbon. Six 8" pieces of each color, with only three of magenta and three of light pink. It is important that the ribbon is straight and smooth. Place each pieces of ribbon tightly against each other. Gaps in the ribbon will cause gaps in the finished roof.
Step 2:
Cut 19 pieces of ribbon each 9" long. Weave these pieces in an over-under method through the ribbon from step 1. Leave the extra ribbon unattached for the time being. Again make sure the ribbon is straight, smooth and does not have gaps between the pieces.
Step 3:
Using the diamond dot adhesive apply a 1/4" line of adhesive along the under side of the roof. (The side without cardstock.) Wrap the excess ribbon smoothly around the edges of the roof and attach onto the adhesive. Now using Zip Dry adhere the (2) 8" x 7" pink cardstock pieces onto the underside of the roof covering the excess ribbon. On the center portion of the roof that was not scored, but is folded adhere the 3" x 8" scored pink cardstock. Make sure that the scored edge fits tightly into the roofs fold. This will help reinforce the roof.
Using Super Tape run it around the narrow edges of the roof. Weave May Arts Scalloped Trim # 360-38-16 green and 360-38-17 pink together. You will need approximately 1 1/3 yards. Remove the plastic covering from the super tape and adhere the woven May Arts ribbon onto the edges of your houses roof. Set the roof and the scalloped pink cardstock aside.
Decorate your house:
On the front and back of the house where the bottom paper and the gable paper meets cover this seam using May Arts 3/4" ribbon #QH17 pink and 7/8" white lace #390-59-09. Each piece should be 6 1/2" long. Use diamond dot adhesive to first adhere the pink ribbon, than apply the diamond dot adhesive onto the wrong side of the lace and attach it over the ribbon.
Make Flowers:
Centers for the large flowers were made using May Arts wired fuzzy pom poms #346-27. Cut the wire mid way between pom poms. Next fold the wire in half with the pom pom at the center. Twist the 2 wires together to keep the pom pom from falling off the wire. Voila, a flower center!!
Fold the 1 1/2" May Arts ribbon in half. I used a 5" piece of ribbon, sew a running stitch along the 2 long edges. You will have a 5" tube. Pull the thread to gather this tube into a circle. Insert the flower center into the circle. Pull the thread tight and stitch the 2 unfinished ends together.
The last step is to stitch across the wrong side (back) of the flower to secure it and keep it from coming apart. Small flowers were made in the same way. I used 3/8" ribbon and beads were substituted for the pom pom center. Ribbons used were May Arts 1 1/2" NR47, NR20, NR22 and May Arts 3/8" KN34, KN46, KN47.
You will want 4-5 large flowers and approximately 7 small flowers. Set the flowers aside.
Hearts and Flourishes:
I cut the decorative hearts and flourishes on my Cricut machine using the Accent Essentials and Home Decor cartridges. If a Cricut is not available to you you could choose to use other types of decoration such as stickers or chipboard. Sizes used are as follows;
Gable flourish 3 1/4" Home Decor cartridge yellow bling cardstock
Parentheses 3 1/2" Home Decor cartridge lavender bling cardstock
Hearts 3 1/4" Accent Essentials cartridge pink bling cardstock/black cardstock background
Chalk the hearts and flourishes using pink pastel. Attach the yellow flourish onto the top front gable using foam tape. Next center and adhere the hearts using diamond dots. Finish by adhering the parentheses using foam tape.
Flowers:
Using May Arts BY66 leaf ribbon cut a small portion of stem with several leaves for each flower. Arrange the flowers and their stems to your liking before adhering them onto the house. When you are satisfied that you have the proper "look" for your flowers attach the stems and leaves using diamond dot. The flowers were attached using Zot Dots, larger flowers may require several dots.
Roof:
Using super tape, run the tape along the pointed top edge of the house gable ends. Now add the roof being careful to have the roof centered with the top point of the front wall matching up to the roofs fold. Gently lay the roofs sides down onto the super tape. Press carefully to secure the roof onto the tape. The tape will hold the roof in place, but do not try to pick the house up by the roof. It may not hold and could tear the cardstock roof lining.
Using the scalloped 8" pink cardstock that had been set aside, apply diamond dots to the wrong side. Place this scalloped piece on the top of the roof. Press gently to adhere to the ribbon. This will hide the "Cut" edge of the roof.
Perches:
Your birdhouse will be complete as soon as you have added the perches.
Find 2 small sticks about 2 1/2" long. I went out in my yard and looked for "artful sticks" as I like to call them. Sticks that have a bit of character, tiny branches, a bit of moss or whatever appeals to you.
Trim the sticks to fit the size of the birdhouse. When you are satisfied with the look use hot glue to attach these perches onto the bottom of the heart shaped "openings".
Congratulations your birdhouse should be complete. It's now ready to bring a bit of spring into your home.


 My favorite little addition is the artful sticks (technical term) found in our yard. I like the way the moss adds more texture to the house.
 Last but not least is another Graphic 45 project. I knew the first time that I saw this line of paper that it had to be a vintage travel case.